I just realized I never posted baby shower crafts from my best friend's baby shower!
Jessica and I (Brianne) along with my other BFF Ari helped lead a craft at the shower and it was a big success!
look at these cuties
materials you will need:
fabric
fusible tape (magic!)
poster board (for stencils)
fabric pens
ruler
scissors
pinking shears
iron (& board)
string
before the shower prep:
the first step is to pick out your fabric
Amanda's nursery theme is yellow and gray, and we found some really cute fabric to match!
next, decide how big you want your flags to be
(you don't want them to look like the Nightmare Before Christmas)
we made ours 5 inches across and 6 inches down to the point, creating an isosceles triangle
the easiest way I found to draw them was to keep the 5" section on the edge of the paper, draw a 6" line down the poster board right in the middle of the top edge, and then use a ruler to draw the sides of the triangle
depending on how many guests there are, make an appropriate amount of flag stencils
you'll also want to have stencils for people to use on their flags
we google searched for simple images to use
here are some ideas: heart, flowers, giraffe, elephant, numbers, letters, shapes
just print out the shapes and then cut them out on your poster board
you should have all this prep work done before the shower, then bring everything along for the guests to create!
it's a good idea to have an example for them to see as well
at the shower instructions:
start with making your flag
turn fabric to the back side to trace so the marks aren't on the front
fold over your fabric to trace it putting the top edge on your crease, that way your flag is double ply and you can pull your string through the top
we had our guests write blessings on the back of their flags, giving the craft a little more of a personal touch!
it also allows the less-crafty people to participate more
once the blessing is written, over to the ironing board to stick the flag sides together
take 2 pieces of fusible tape and put them on the inside edges of your flag
leave about 1/2-1 inch at the top open
the fusible tape should have directions on the package
on ours, it said to iron with a damp cloth 10 seconds on each side
look at my cute little sister
ironing is fun!
after the sides are ironed together, pick out what shapes you want on your flag
it's good to have a mix of simple and busy, and 1-3 shapes is best
trace the backside of the fabric with your choice of stencils and cut them out (pencil works better than pen for not bleeding through)
decide how you want to arrange the cutouts on your flag, then use fusible tape
& the iron to stick them on in place
it doesn't take too much tape to get them to stay on since this will be just hanging somewhere rather than worn or used
look how great they turned out!
we found they weren't holding up very well just strung through at the top, so I went back in with a sewing machine to sew the very top of the flags just about a quarter of an inch down, making the string easier to go through them
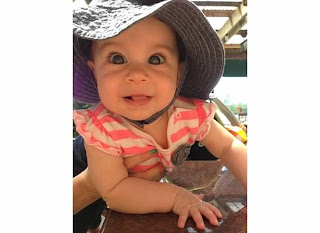
since I'm so late in posting this, here's a bonus: a pic of little miss Layla now!


