Monday, February 20, 2012

JOY yarn letters

these yarn letters make for a great mantlepiece or bedroom display


what you need:
yarn
mod podge or hot glue
paint brush
scissors
wooden or plastic letters (we got ours from Michaels Crafts)


tie the yarn onto the letter with a simple knot 

start wrapping the yarn around the letter

depending on the letter, you can start in the middle or on the edges


use mod podge on the curves of the letter to help keep the yarn in place, or on the edges to help the yarn cover the surface completely 


you might need to do multiple layers in some areas to cover both the top and the sides


final product - so joyous!


cheerful display for Valentine's Day! 


**notice the Lace Candles behind the letters from our first post

I (Tanya) gave these JOY letters to my lovely sister, Nicole, for her birthday 

I hope these letters bring warmth and inspiration to her home!

Sunday, February 19, 2012

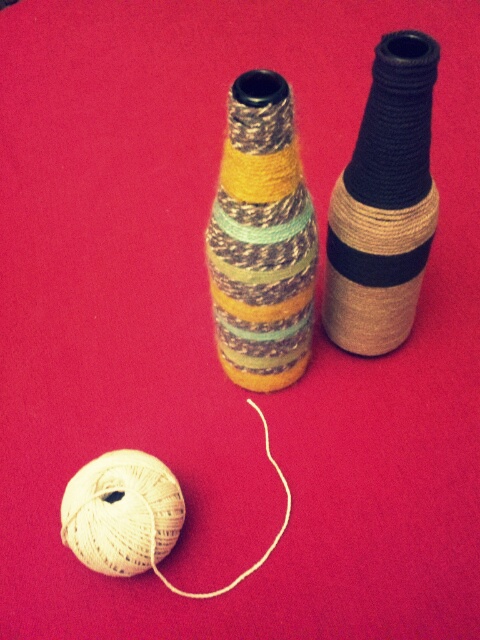
DIY: yarn bottle vases

how to: yarn bottle vases!


obviously they make us very happy!


what you need:
 clean beer or wine bottle, or empty mason jar
mod podge
paint brush
yarn
scissors


clean the inside and outside of your bottle
(you don't need to peel the labels off because they will be covered)


cover the bottle with a thin layer of mod podge, starting at the bottom and working your way up
(only do a small area at a time as the mod podge will dry out)


(also notice the great hex nut bracelet on display)


starting at the bottom, wrap the yarn around the bottle 

if you want to use multiple colors, cut the yarn at the desired place and either tuck it onto the last row before starting the new row of color or start the next color where you left off


the going may get a little tough going up the curved part of the bottle, but stick with it! the mod podge should hold it in place


once your bottle is fully covered all the way to the top, cut the final string and tuck it into the yarn, or just use mod podge to hold it in place


final products - lovely!


try using different yarn patters (like our gray and white striped one) for a more textured look


our newest crafter, Monica!
love the multi colored pattern


note: when holding them like this, they may get mistaken for beer koozies!


Wednesday, February 15, 2012

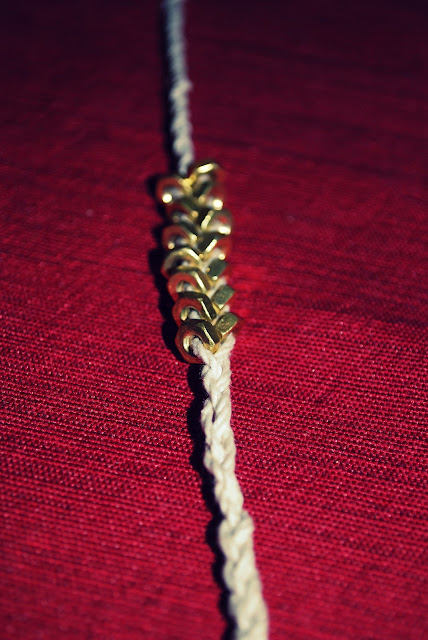
DIY: Hex Nut Braided Bracelet

how to create a beautiful industrial hex nut bracelet for your everyday life!


what you need:
a few yards of twine
small brass hex nuts
clasps for the end of the bracelet
something heavy (like a wine bottle!) to hold down the end of your bracelet


cut off three strands of twine, all the same length 

start by tying a knot at the end with 1-2 inches hanging off

 to hold the string steady, a book, wine bottle, or a pan of freshly baked brownies works well


braid the strands for about 12 inches 


this part might get difficult, so you may need the extra hands of a friend!


take one of the hex nuts and loop it onto one stitch of the braid
secure it into place in the braid with your finger and continue to braid 2 more stiches, then add another hex nut to either the same or the other side

continue this pattern, tightening it as you go

after you have as much as many hex nuts as desired, continue braiding for as long as you'd like your bracelet, then tie a knot the end 
attach a clasp to each end


the double-sided pattern...


and the single-sided pattern!